Thursday, March 31, 2011

Stamping Classroom - Almost Finished!

So, i've been less than active posting on my blog for the better part of this week.  You see, I'll be teaching my first stamping class on Saturday and have been furiously preparing card projects, but even more than that, I've been revamping my basement so it's fit for human habitation.

What used to be a large space decorated in the "Cardboard Box and Forgotten Furniture" style of decorating is nearing completion, and I'm just so happy with the way it's coming together that I wanted to show a few preview pictures.

My goal was to create an inspirational, inviting space using stuff I already had.  There are a few corners I am exceptionally proud of and wanted to share them with you.

First up are these sconces. I have been saving these wrought iron and glass things for the last 10 years, and I'd never bothered to hang them anywhere

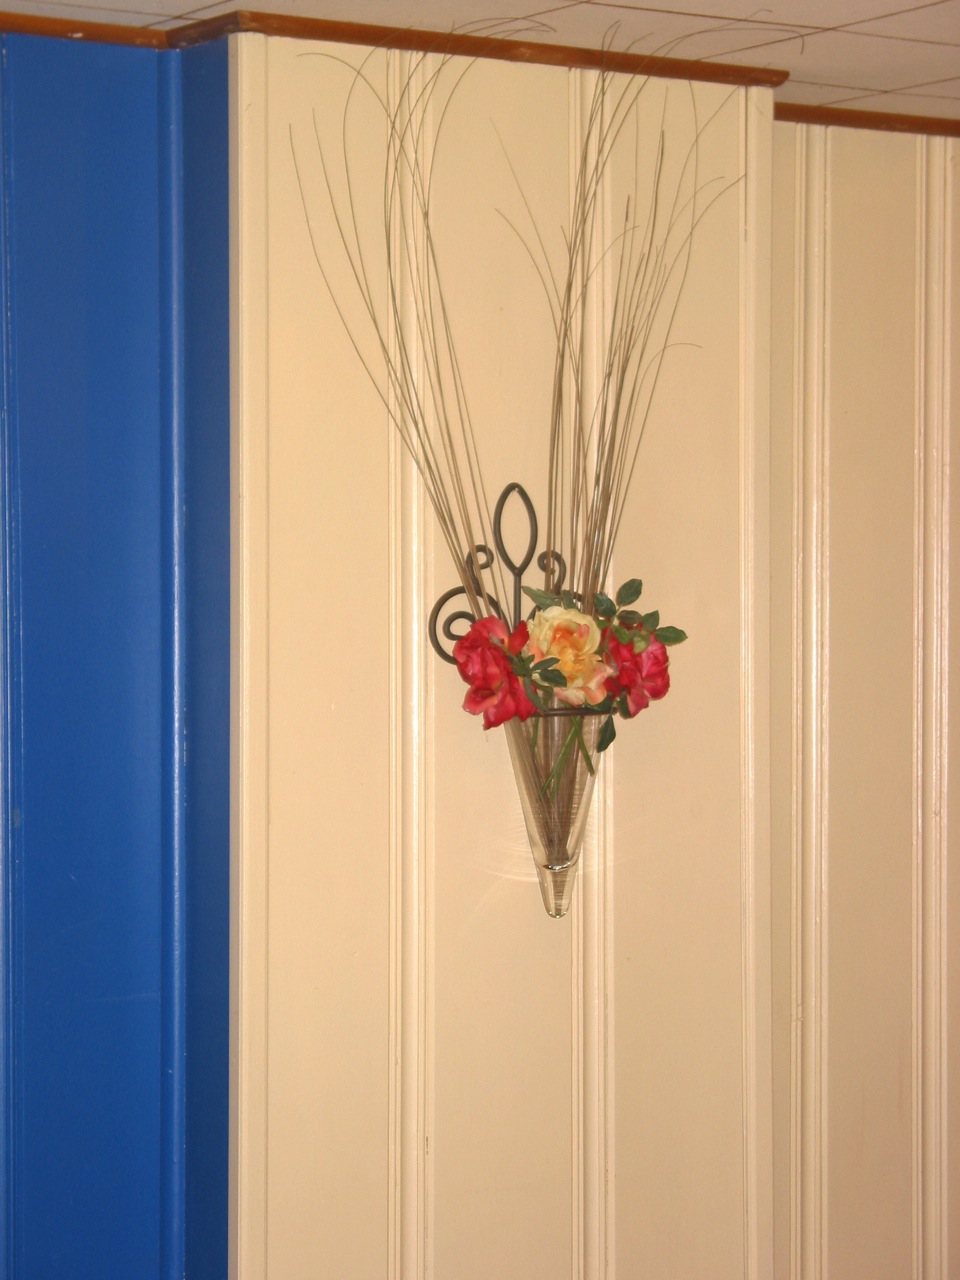
As it turns out, the walls of my basement already have nails in strategic places (thanks to my dear friend, MJ for that!), so putting these up was easy peasy!  I filled them with some silk flowers and dried grasses, also from my leftover decorating stash.  I have 2 of these sconces strategically placed around the room and they work wonders towards brightening the space.

This next photo is where I'll be putting the Big Shot for Saturday's class.


I picked up that rocking chair at an estate sale for $12, hung some photos that I never got to using in the main part of my house, and filled the space with other furniture that I found as I was wading through my basement.  To the right of the picture you can see the basement door... that is going to be my classroom entrance so people won't need to be traipsing about the rest of my messy house ;-)


Here's another corner of the basement.  This one is where I'm going to put out a few catalogs (the wrought iron holder on the wall to the left is going to hold catty's and order forms).  The table is an old Child's school desk that I also unearthed in my basement cleanout.  I think it makes a fun, rustic statement! Also, the chairs should be out in my back yard, but I rather like them where they are ;-)  That eiffel tower hanging on the wall is the only thing I bought specifically for this remake.  I got it on clearance a few weeks back from an online store, and it holds some of my latest projects to serve as inspiration for my guests.

This last photo is a little vignette thats been stuck in my head for the last few weeks. The birdhouse is a gift from a wonderful friend (again, thank you, MJ!), the easel was another basement find, the chain is leftover from a chandelier project in my dining room, and the wall shelf I picked up about a year ago at a thrift shop. I think this is my favorite corner of this room redo, even though it's really just "for show". In case you're wondering, inside the cage is a beanie baby, who I fully intend to swap out for something else, yet I suspect I will prolly forget to do it ;-)

So, that's it for teaser pictures.  All my workspace tables are piled high with junk, so I didn't want to take pictures of them yet ;-)  I've got a good sized table for 6 down here, and then 2 card tables and chairs so I can fit a total of 12 people down here comfortably.  Will I ever be teaching 12 people at once?  Prolly not but at least I CAN ;-)

Anyways, thanks for taking a peek! now, it's back to cleaning for this gal -_-

michey

Tuesday, March 29, 2011

Check Out My New Blog Bling!

Oh, what a happy e-mail I just received from Shannon!  My Cheery Cherry Blossoms card was chosen as an artist pick over at Handstamped Sentiments!  So now i've got my very first bit of blog bling featured over there in the right column =D  I'm sooooo over the moon over this!  Looking at the other winners, the fact my card was chosen to be among them is truly an honor =D

Anyways, thanks for letting me gush!  I need to head back to my basement and finish setting up for my Saturday class.  it's coming along VERY nicely and I can't wait to post some pictures showing what the space has evolved into.

Happy Stamping!
Michey

An Exercise in Neutrals

One of my dear, dear friends is celebrating a birthday in early April, so it was back to the craft room to see what I could come up with. Thankfully, I had a little help from the talent at Stamping Celebration, whose inspiration challenge this week was an exercise in Neutrals.


Now, when I first sat down to create Julie's card, I ended up deviating from my original plan and instead created a card that wasn't really "her".  So, while that card was fun and all (and available here), I really wanted to create something specific to her tastes.

And so, this card was born.


This card was an evolutionary process for me.  I stumbled upon a wonderful tutorial for the background technique from Kathy's blog at stampingstill.blogspot.com.  She used a series of masks to create a mosaic-esque, collagey background that I absolutely fell in love with!  (her tutorial also used stamps that I happened to have on hand, so I was doubley excited to CASE her beautiful idea).

I definitely want to try this technique again using more colors, I really think that makes the technique shine, but for the purposes of this card, I wanted to keep the background neutral.  Why, you ask? Well, because of my color challenge, of course!

I've interpreted the inspiration challenge into a Very Vanilla, Basic Black, and Crumb Cake card that has just a hint of white. (I pulled out my white gel pen again to give the flowers a little pop.  For another card using this technique, see my Cheery Cherry Blossoms).

With Julie's card, I zeroed in on the stamps pretty quickly.  You see, she is nuts about music and married to a musician.  Music is a big part of her life, so I chose to honor that by using the Music Notes stamping wheel.  (Full disclosure here, I've unmounted all of my wheels because I find I can be more spontaneous with them this way.)  I paired Music Notes with the Friendly Words jumbo wheel (also unmounted), and stamps from Friends 24/7 and Perfect Punches.

I find that when I'm designing a card for a specific person (as opposed to for a class or "just because"), I take FOREVA to come up with something that is tailored to them.  These are the cards that I "tinker" with to get just perfect and they also give me the most enjoyment when all is said and done.

Julie is a doll and I know she'd appreciate whatever I send her, but I'm in the business of sending smiles, so might as well go big or go home, ya know? ;-)


DETAILS - Products are available for purchase from me  at Stampin' Up

Stamps: Music Notes Stampin Wheel, Friendly Words Jumbo Wheel, Friends 24/7, Perfect Punches
Paper: Very Vanilla, Basic Black Crumb Cake
Ink: Basic Black, Crumb Cake, Soft Suede
Accessories: Two Tags bigz die, 2 x 1 3/8 Oval Punch, White Gel Pen

Sunday, March 27, 2011

Birthday Hydrangeas

When I first set out to craft this birthday card, I was absolutely positively without a doubt going to use patterned paper.  I was pretty sure I was finally going to break into my stash of Love Letters Designer Series Paper but as I was searching through my stamp sets, I spied the gorgeous hydrangea from the Because I Care hostess set, and my carefully laid DSP plans scattered to the wind....


The trickiest thing about this card for me was trying to figure out where to put the sentiment. My Top Note die is a recent acquisition that I've only used a handful of times so far (sacrilege! Believe me, I know >.<).  As such,  I didn't think ahead to how I'd plan the space. I originally planned to fit in a ribbon, border punch strip, and sentiment all towards the bottom of the card, and I kinda lost track of how much room i'd have >.<  Catty-cornering the sentiment up at the top makes it feel like an honest to goodness "birthday banner" which I think i'm ok with =) I also gave it a bit of lift in the center to give it a smidge of movement and dimension.

This ribbon treatment was a new one for me.  Normally this striped grosgrain is a delicious 1 1/4" thick, but if you cut it down the middle, you're left with a neat little strip that lends itself to fringing by pulling strands out from the cut edge.  I want to play with this technique just a bit more to see how I can get the fringe to be a bit more "crumpled" and "fringey" looking but for a first attempt, I really like the way this turned out!  And, this technique effectively doubles the amount of ribbon you have, so it's a triple word score bonus!

Other techniques used on this card include sponging around the edges of the top note with Sahara Sand ink, and it's hard to tell from the photo, but the black background layer has been run through the Big Shot with the Vintage Wallpaper embossing folder.

Maybe my next card will give me the opportunity to cut into my Love Letter DSP?  It's kinda funny how all the planning and forethought in the world can be so easily cast aside when inspiration takes over.


DETAILS - Products are available for purchase from me  at Stampin' Up

Stamps: Because I Care, Something to Celebrate
Paper: Basic Black, Perfect Plum, Very Vanilla
Ink: Perfect Plum, Pear Pizzazz, Sahara Sand (around edges)
Accessories: Basic Black 1 1/4" Striped Grosgrain, Antique Brads, Scallop Trim Border Punch, Top Note Die, Vintage Wallpaper Embossing Folder

Friday, March 25, 2011

Happy to be a Papercrafter

Today's story is a departure from my normal "Lookie what I made!!1!" post. Newp, today I present to you a story fraught with adventure, drama, and a sprinkling of Richard Dean Anderson.

Before I can go into details, I wanted to share with you my two furbabies, who are the stars villains of today's little story.

First up is Oliver (affectionately named Oliver Kittlesworth III). He's my photogenic lap-cat that loves to lounge and carries with him a certain "Je ne sais quoi".


This is one of my most favorite pictures of him because he's a beautiful gray lap kitty lounging on a beautiful gray laptop. When I'm at home, writing these posts, I usually have both him and the laptop on me, so this photo is a nice summary of my blogging experience =)

My other furbaby, and the catalyst for this post, is little miss Punkie Mewster (Punkie for short).


Punkie is Oliver's sister, and she's a no nonsense kinda gal.  She loves people-scratchums but Oliver is such an attention magnet that she can be very dismissive when he's around. Because of this, they have a really funny dynamic around each other.

So, now that you've met the stars of todays episode, it's time to explain why I'm happy to be a papercrafter (other than the obvious of being able to roll around in pretty papers, and go about my day with inky fingers ;-)

You see, I live in an older house whose main bathroom is desperately in need of a remodel. The sink and attached cabinet is decidedly "vintage" and the little drain stopper is long gone, so anything that falls into the sink is fair game to end up down in the pipes. I've lived here for 2 years and haven't lost anything yet, so I've been avoiding a remodel to make sure I have money left over for stampy goodness.  Genius, right?

Also important to this story is the fact that Oliver and Punkie are both obsessed with water. They love splashing around in a drippy faucet, and clamor for the sink when it's time to brush teeth or wash hands.

This particular morning, I was readying myself for the day. I had given my hair a generous spray of curl stuff, but neglectfully left the little plastic cap loose on the counter. Seeing me in the bathroom and eager to paw around the sink before her nosey brother came lumbering in, Punkie excitedly jumped up on the bathroom sink and promptly knocked the little plastic hairspray cap down the drain >.<

I peeked down into the hole, and could see it down there just out of reach.  The pipe was narrow enough that fingers couldn't get a grip on it, but loose enough that jostling the cap too much threatened to push it down into the P-trap to be lost forever.

So with thoughts of plumbers and bills and replaced pipes dancing in my brain, I wandered into my craft room looking for SOMETHING that could get me out of this mess.  My eyes settled upon my paper piercer and my trusty box of glue dots and I asked myself "What would MacGuyver do in this situation?"

I took a glue dot and stuck it onto the end of my paper piercer. The glue dots are super sticky so they don't take a lot of pressure to get stuff to stick to them, and the paper piercer was long enough to be able to reach down the drain where my fingers couldn't easily go. I snaked the sticky-ended piercer down the drain, glue-dotted the lid to the piercer, and fished the lid out, much like the steady-handed game of "Operation" I played as a child.

And just like that, my sink dilemma was solved!  Punkie did manage to finally get her scratchums just in the nick of time, because soon after, Oliver assumed his normal position:


That, my friends, is why I'm happy to be a papercrafter. To be able to fashion a household plumbing solution out of a ragtag bunch of supplies that I just "happened to have on-hand" is a beautiful, beautiful thing.  MacGuyver would be proud!

Wednesday, March 23, 2011

A Personal Challenge

As you can probably wager by going back through some of my recent posts, I'm head-over-heels in love with the soon-to-be-released Paisley Petals DSP.

In general, I adore the different patterns;  one of them, however, I find incredibly challenging to use.  It's colors are not only waaaay outside my personal comfort zone, but I didn't really have much of anything to match:


This sheet is predominantly Tangerine Tango with little seed pods all over the place.  It reverses to a really pretty green print, but using just that side wouldn't really be much of a challenge, because it's so purty and I  it!

Anywho, here's what I came up with:


It's true, I didn't go hog wild with the tangerine tango side, but baby steps, ya know? ;-)  Also making an appearance is the Four Frames stamp set nestled inside a decorative label punchout.  The "Thank You" is from the Because I Care hostess set. It's hard to tell, but there's also a bit of sparkle from some Champagne Mist shimmer paint over the embossed parts of the background.

All in all, it's a pretty tame, earthy card with a punch of YOWZA. I'm not completely smitten with the way this card turned out, but it's a start!  I need to spend some more time inside my comfort zone before I tango with tangerines again, I think ;-)

DETAILS - Products are available for purchase from me  at Stampin' Up

Stamps: Four Frames, Because I Care
Paper: Crumb Cake, Always Artichoke, Pear Pizzazz, Paisley Petals DSP
Ink: Always Artichoke
Accessories: Elegant Lines Embossing Folder, Champagne Mist Glimmer Paint, Basic Pearls, Glimmer Brad, 1 3/4" Scallop Circle Punch, Boho Blossom Punch, Top Note Die

Sunday, March 20, 2011

Cheery Cherry Blossoms

Cherry Blossoms are a BIG DEAL here in the Nation's capital.  Is it any wonder that I am oh-so-smitten with this stamp from the Easter Blossoms set?  Who better to share this obsession with than the lucky victims people taking my card class on April 2?  =)

Michey's note:  I've decided to enter this card into the Handstamped Sentiments Challenge.  The theme this week is Blooming Blossoms (JUST in time for spring, whoopie!!!), so be sure to check it out for some amazing inspiration!


The thing that I absolutely love about this card is the white gel pen.  I adore this gel pen technique because it's incredibly forgiving, and the flowers practically jump off the page.

I first spied versions of this technique floating around the internetz, and after a bit of research, I found the original creatress (is that a word? it is now!) was Laurie Zoellmer on Dawn Olchefske's blog.

So now I have a proof of concept for a class project!   If you're in the Washington DC area and would like an opportunity to make cards like this, there are still a few spots available for my April 2 class. The cards we make in class will be just a little bit different, but consider this an inspirational sneak peek ;-)

Visit http://michey.stampinup.net for more details about this and other upcoming events in and around the DC Metro area.


DETAILS - Products are available for purchase from me  at Stampin' Up

Stamps: Easter Blossoms
Paper: Crumb Cake, Blushing Bride, Early Espresso
Ink: Early Espresso, White Gel Pen
Accessories: Framed Tulips Embossing Folder, White Signo Gel Pen

Saturday, March 19, 2011

Fan-Folded Medallion Tutorial

If you're a stalker of the handmade card and scrapbook industry like I am, you've no doubt noticed that fan-folded medallions are all the rage right now.  Being a bit on the frugal side, i've put together this little tutorial on how I make a fan-folded half medallion 'on the cheap'.  My "Blueberries and Lace" Anniversary Card, where I first used this technique, has already been mailed off to the happy couple, so i'm switching up my materials to bring you this tutorial.


To start, you'll need a piece of patterned paper that measures 1.5 inches by 6 inches, and a 1 inch round piece of paper (this round piece won't show on your finished card so you can just use a scrap of something.  For this example, i'm using a piece of elegant soiree DSP (I really like how the fan turns out when you use a horizontal stripe - you'll see at the end how it makes a really cool pattern) and a piece of whisper white punched with a 1 inch circle punch.


First we'll start with our patterned paper. Score along the length of the piece every 1/4 inch with your paper cutter or favorite scoring tool.


Next, flip the paper over and apply adhesive to one of the long edges. This is the edge we will be adhering our crochet ribbon to. I like to use a strong adhesive for this part - sticky strip will work nicely.


Adhere the crochet ribbon to the adhesive, making sure that some of it hangs over the edge of the paper. This is the part that will be showing when we flip our paper back over and form our fan.


Flip the paper back over and fold along the score lines in an accordion fashion. Make sure that on the first and last score line, you fold the paper away from you so there is a peak on both ends. This will ensure you have nicely finished edges when all is said and done.


Now, remember that 1 inch circle we punched out?  Grab that and score 2 lines 1/4 inch apart as shown.


Fold along those score lines and shmear a dimensional adhesive, like crystal effects, around the entire piece. You don't want to gob too much on, but you still want good coverage.  What I like to do is fill the part between the score lines with adhesive, then stop squeezing the bottle and just use the bottle tip to push the glue out to cover the rest of the circle.


This next part is kind of hard to describe, but by looking at the finished piece, you should get an idea of what you have to do. Take your patterned paper and scrunch it all up so it makes the fan shape.  You'll then take the base of that fan and sandwich it inside the folded round piece.  Once its in there, you can play with the fan folds a bit to make sure it is as open or as closed as you'd like.


All that's left at this point is to just trim the edges of your crochet ribbon and your half-medallion is ready to be adhered to your project!  See the cool pattern that using the striped paper gives to the finished fan? Neat-o torpedo, eh? =)


For the rest of the card, I used more patterned paper from Elegant Soiree, and the Bliss stamp set, which, as part of Sale-a-Bration, you can get free for the next 2 weeks with any $50 purchase from Stampin Up!

Here's the finished card:


And here's a closeup of the rosette:


Thanks for toughing it out all the way to the end of this post! Now your reward is to tell me what you thought of this tutorial - i've never done one before, so any and all feedback is greatly appreciated!

Thanks for taking a peek!


DETAILS - All Products are available for purchase from me at Stampin' Up

Stamps: Bliss
Paper: Crumb Cake, Soft Suede, Baja Breeze, Elegant Soiree DSP
Ink: Crumb Cake, Soft Suede
Accessories: Full Heart Punch & Embosslit, Dotted Scallop Ribbon Border Punch, Victoria Crochet Ribbon

Thursday, March 17, 2011

Blueberries and Lace Anniversary Card

This "Blueberries and Lace" Anniversary card was truly an exercise in patience.  Don't get me wrong, I'm absolutely THRILLED with the final product, but gosh darnit, getting there was quite a trip, lol!


When I sat down to create this piece, I wanted something a little bit vintagy, kinda shabby and with a "collected" look about it. I was picturing something with lace and swirls and all sorts of "stuff" on it. I knew this card was going to have either a rosette or a doily on it, and I knew I wanted to use my Blueberry Crisp DSP, but honestly, I hadn't thought much farther than that.

So, after 1 ripped up card base (I switched from Sahara Sand to Very Vanilla after stuff was secured down >.<), 2 crumpled doilies (I gave up on the doilies... we just weren't getting along this evening >.<), 3 rosettes and 4 hours, I finally arrived at long-awaited perfection!

This was my first time making a rosette. The premise of it is a strip of paper (mine was 1.75" wide and between 6 and 12 inches long), scored every 1/4", folded like a fan and secured with glue into either a circle or a half circle. The first one that I made, I used a full 12 inches of paper. I only wanted it to be a half circle so by the time I had it all glued up, it was just tooooo dense. The second one was 1 3/4" by 6". Ahh, now this was definitely a more manageable length, but after it all came together, I kept wishing it had a bit of lace fastened to the end. So I threw caution to the wind and tried one more time.

The last rosette started out as a 1 3/4" x 6" strip of paper. As before, I scored it every 1/4" but before I fan-folded it, I secured some Victoria Ribbon to the edge (Note to self: reorder Victoria Ribbon soon... i use it so much my roll is running low >.<). Then I did my fanfolding and gluing and VOILA! I finally had the perfect Rosette!

Michey's Note:  For a step-by-step tutorial on how I made the fan-folded medallion, please see this post.


I won't bore you with the details of my frustration creative process with the rest of this card. Rest assured my desk is a battlefield of failed ideas, abandoned experiments, and changed directions =) In the end, though, I couldn't be more tickled with the finished project! As the saying goes "Every rosette has it's thorn..."

DETAILS - Products are available for purchase from me  at Stampin' Up

Stamps: Elizabeth, Punch Potpourri, Something to Celebrate
Paper: Very Vanilla, Pacific Point, Sahara Sand, Blueberry Crisp DSP
Ink: Pacific Point, Sahara Sand
Accessories: Full Heart Punch & Embosslit, Scallop Trim Border Punch, Victoria Ribbon, Very Vanilla Satin Ribbon, Double Rectangle Punch (Retired)

Tuesday, March 15, 2011

Thinking of You (and of brand new paper!)

Sale-a-Bration is such a great time of the year - With every $50 you spend in Stampin Up merchandise, you get a free stamp set!  I've taken advantage of this offer multiple times over the last few months *hangs head in shame*, and one of the sets I received is one that I honestly hadn't really considered until I realized I could get it for free. That set is....

Three Little Words! The stylized flower jives really well with some of the new Paisley Petals DSP. This paper isn't yet available to the public (but it will be soon!) so until you can get your hot little hands on it, I hope you enjoy this sneak peak.


I adore this paisley print.  It's got a whole slew of colors in it, which means it can go with lots of the colors you may already have in your stash.  With this card, I chose to use Marina Mist, Not Quite Navy, and Soft Suede.  (To see what this same paper looks like with River Rock and Peach Parfait, be sure to take a gander at my Nontraditional Baby Shower Card).

The flowery background is the floral image from Three Little Words, stamped repeatedly with Versamark ink.  I used the Scallop Ribbon border punch to separate the paper from the cardstock (this is a fantastic shortcut if you don't have the right color ribbon for your project) and the Flower is layers of 1 3/4 scallop circle punchouts in Not Quite Navy and a baja breeze boho blossom punchout (say that 3 times fast ^.^) fastened together with an Antique Brad.  Finally, the sentiment (also from Three Little Words) is stamped in Not Quite Navy ink.

Throughout the next month, i'll be featuring more projects using this dreamy new paper collection, as well as an even dreamier new stamp set that coordinates with the also-dreamy Decorative Label Punch.  

Stop by again for more sneakety peeks, or even better, enter your e-mail address in the box to the right to receive my new blog posts right there in your mailbox ;-)

DETAILS - Products are available for purchase from me at Stampin' Up

Stamps: Three Little Words
Paper: Marina Mist, Soft Suede, Not Quite Navy, Baja Breeze, Paisley Petals DSP
Ink: Versamark, Not Quite Navy
Accessories: Antique Brads, Dotted Scallop Ribbon Border Punch


Monday, March 14, 2011

Labor of Love - Easter Blossoms!

Have you ever come across a new technique and instantly had your own version of it mentally pictured in your head?  Well, when I first came across a YouTube tutorial on the Brick Wall Technique, I knew I wanted to give it a try, and I also knew exactly what stamp to use.


Today's stamp is from the Easter Blossoms set out of the Occaisions Mini.  I stamped on Sahara Sand cardstock, colored in with Blushing Bride markers, then used my paper trimmer and Sahara Sand ink to create the brick wall illusion.  I ran the completed piece through the Big Shot with the Elegant Lines embossing folder and mounted the entire assembly onto a River Rock card embossed with the Framed Tulips embossing folder.

The whole thing is tied together using Blushing Bride and Victoria Ribbon.  I'm so tickled with the way this turned out! The Brick Wall technique was easy, but time consuming, with wonderful results.  I think i'll file this beauty under the "Labor of Love" category. =)


DETAILS - Products are available for purchase from me  at Stampin' Up

Stamps: Easter Blossoms
Paper: Sahara Sand, Blushing Bride, River Rock
Ink: Staz-on Black, Blushing Bride, Sahara Sand
Accessories: Elegant Lines Embossing Folder, Framed Tulips Embossing Folder, Blushing Bride Ribbon, Victoria ribbon.

Sunday, March 13, 2011

Blog Redesign (aka Spring Cleaning!)

I dusted off my photoshop skills today and got down to redesigning the good ol' blog.  I'm quite tickled with the way it turned out!

Full disclosure here: I haven't yet taken the plunge to purchase My Digital Studio, but I was elated to find out that you don't need their software in order to use their Digital Downloads!

So, with my credit card in tow, I went browsing the digital dowloads and settled upon the digital version of my current favorite paper collection: Springtime Vintage.  I chose one of the high-res patterns in the download and got down to creating!

And so, my newly designed blog is born.  I'm SO happy to be away from the default google template I was sporting before. For someone that does web design for a living, that was just embarrassing >.<

Anywho, thanks for taking a peek!

Saturday, March 12, 2011

Sneakin' and Peekin'

One thing I like more than stampy supplies is stampy supplies that aren't yet available to the general public!  On March 1, Stampin up pre-released some new Designer Series Paper and stamps to demonstrators (one of the wonderful perks to being a Demo, let me assure you!) and natch I had to include these in my latest order.

The paper is absolutely, positively delicious! and the stamps?  Well, they coordinate with my favorite and never-put-away Decorative Label Punch, so I KNEW I was going to love them to itty bitty pieces.

Over the next few weeks, i'll be posting projects using these dreamy new lovelies, so I hope you'll be just as enamored with these goodies as I am!

This first card is a nontraditional take on a baby shower card.  The mom-to-be has chosen to be surprised about whether her bundle of joy is a boy-bundle, or a girl-bundle, so I instead chose a more elegant approach entitled "Baby Love" (yes, the supremes are now stuck in my head >.<)


This card uses a technique that's super simple. See that "love" plaque in the center of the card?  If you were to run your fingers over it, you'd notice it's "debossed".  That means where all the letters are, it's actually indented in to the page.  This is called (dramatic pause) LETTERPRESS (cuz, like, the letters are pressed into the page n stuff... neat, eh?)  It's an old-timey technique that's been revolutionized for the Big Shot.  In this case, I'm using the Lots of Love letterpress plate,  Versamark ink, and the trusty Big Shot.

Anywho, I digress - as i tend to do when I'm talking about stuff I LUUURVE.  The Paisley Petals DSP is going to be available in the upcoming 2011 Big Catalog.  The frame surrounding "Baby" is part of "Four Frames" set of 4 stamps, each of which coordinate beautifully with the Decorative Label Punch.  This new stamp set too will be available in the new catalog.

I needa get myself back to crafting, so tune in next time for another sneakety peek!


DETAILS - Products are available for purchase from me  at Stampin' Up

Stamps: Four Frames
Paper: River Rock, Peach Parfait, Paisley Petals DSP
Ink: Versamark, Cherry Cobbler, River Rock
Accessories: Lots of Love Letterpress plate, Two Tags bigz die, Vintage Seam Binding from my personal stash, Bling, Dotted Scallop Ribbon Border Punch, Scallop Oval and XL Oval Punch, Decorative Label Punch

Friday, March 11, 2011

"Rounding Out" the Early March Birthdays

Let's be honest, by the time you get to making the third birthday card in under a week, you start to despise stamps that say "Happy Birthday", amirite?


For this birthday card, I reached deeeeep into my stash to pull out a "Thinking of You" stamp from a retired SU set, and BOY am I glad I did. I adore the way it fills out the empty space!

The rest of the supplies are relatively simple (I like to keep my masculine cards non-fussy like that).  The lighthouse is colored in with Copics, the corners have been chomped ("Rounded out" if you will...) with my corner chomper, and handstitched hemp twine finishes things off.

I'm just tickled with the way this card turned out!  Maybe these masculine cards aren't so tough after all? ^.^


DETAILS

Stamps: Guiding Light (Flourishes), All Year Cheer 1 (Stampin Up)
Cardstock:  SU So Saffron, PTI Ocean Tides, Neenah Solar White, Websters Pages patterned paper
Ink:  Memento Tuxedo Black, Antique Linen Distress Ink, Copic markers
Accessories:  Hemp Twine, Corner Chomper

Wednesday, March 9, 2011

A Well-Deserved Break

In the midst of my March Masculine-card Marathon, I needed a break.  Not from crafting, mind you, heavens no!  I needed a break from my "boy supplies".  You know, the hemp twine, the kraft cardstock, the woodgrain texture plates.  Yes, I needed to create something absolutely, positively GIRLY.  We're talking about something thats undeniably pink, flowery, and pearly.  We're talking.... this!


This card is for no one in particular ME!  Ohhhh pink, how i've missed you so!

The floral paper is Springtime Vintage Designer Series Paper, layered on Rose Red cardstock  stamped repeatedly with the flourish stamp from Friends 24/7.  Isn't it neat how you get a striking tone-on-tone using rose red ink on rose red cardstock?

The floral focal point is also from Friends 24/7 (I absolutely ADORE this set, can you tell?).  I colored directly on the stamp with Rose Red and Pear Pizzazz markers, then stamped my image.  The 3 flowers are from the hostess set Punch Potpourri and punched with the super-cute coordinating Boho Blossoms Punch.   I lightly inked the edges, added a few pearls and that's all she wrote!

I'll be sharing the last of my masculine birthday cards later this week - It's for my brother and I don't want to spoil the surprise before he gets it =)


DETAILS - All products available for purchase from Stampin Up!

Stamps: Friends 24/7, Punch Potpourri
Cardstock:  Whisper White, Rose Red, and Springtime Vintage DSP
Ink:  Rose Red, Pear Pizzaaz
Accessories:  Boho Blossoms Punch, Basic Pearls, Sewing Machine, Stampin' Dimensionals

Monday, March 7, 2011

March Madness continued....

I had some serious studio time this weekend to try and knock out my crafting to-do list -  (I have 3 non-girly, card-giving events at the beginning of March).  The first was a birthday card for my father (which, he absolutely positively LOVED).  The next card on the agenda was a birthday card for my Nephew.

Said card was a double whammy for me, because not only is he a boy (a challenge in and of itself), but he's also 11 years old.  If there's one thing my crafting stash has a hard time supporting, its kid-friendly boy cards >.<

So I called in the troops!  I got together with some of my gal pals, and we pooled supplies to create... (dramatic pause)


This card was a team effort if ever there was one!  The owl is Stampin Up's super cute Two-Step Owl Punch punched from Soft Suede Cardstock.  His little cupcake-toting wings were first punched using the Scallop Oval punch, and then punched again from the 1 3/4" x 7/8" oval punch.  The cherry is punched with the Build-a-Cupcake XL punch , and the Sentiment is from A Word for You.

The most important piece of this card is the wonderful, awesome ladies who pooled their supplies together to help a sister out =)  My upline, Kerry, provided refreshments, crafting space, the sentiment stamp and ink, Wendy contributed the owl punch and cupcake punch, Gayle provided girl scout cookies (Nom nom!), and Eileen provided entertainment and inspiration to get the job done!

And that cupcake stamp, you ask?  Well, that was also courtesy of Wendy, but it's from a retired SU set that I didn't catch the name of >.< anyone have any ideas?

2 cards down, 1 more to go!


DETAILS - All products are available for purchase from my website at Stampin Up!

Stamps: A Word for You, and a mystery retired set
Cardstock:  River Rock, Riding Hood Red, Baja Breeze, Whisper White, Soft Suede
Ink:  Soft Suede
Accessories:  Embossing folder, white gel pen, owl punch, cupcake punch, scallop oval punch, oval punch.

Saturday, March 5, 2011

Kindred Spirits in Unexpected Places

The other day at work, a casual conversation turned into an unexpected but most welcome surprise!  I was chatting with a fellow coworker and we discovered a mutual enjoyment for crafty stuff!  Finding a kindred spirit like this doesn't happen every day, in fact, it's actually a rare occurrence for me, so I decided to celebrate our newfound kinship with this card.


Since that fateful (lol) conversation, i've discovered that we are also Curly Girl sisters!  (I'm a 3A and she's a really cute mixture of 3B, 3C with an occaisional sprinkling of 3A).

It's always nice to find someone that shares a common interest, but also feels your pain when you are having a bad hair day, amirite?

Details: All products are available for purchase from my website at Stampin Up!
Stamps: Simple Friendship
Patterned Paper: Elegant Soirée
Cardstock: Crumb Cake, Baja Breeze, Soft Suede
Ink: Close to Cocoa
Accessories: Victoria Ribbon, Pearls tinted with Copics, Elegant Lines Embossing Folder
Related Posts Plugin for WordPress, Blogger...